Air-Dry Clay or Paper Pulp for a Small Sculptural Form?
Air-dry clay or paper pulp: compare weight, surface, shaping and finish so you can choose a material that suits the small sculpture you want to make.
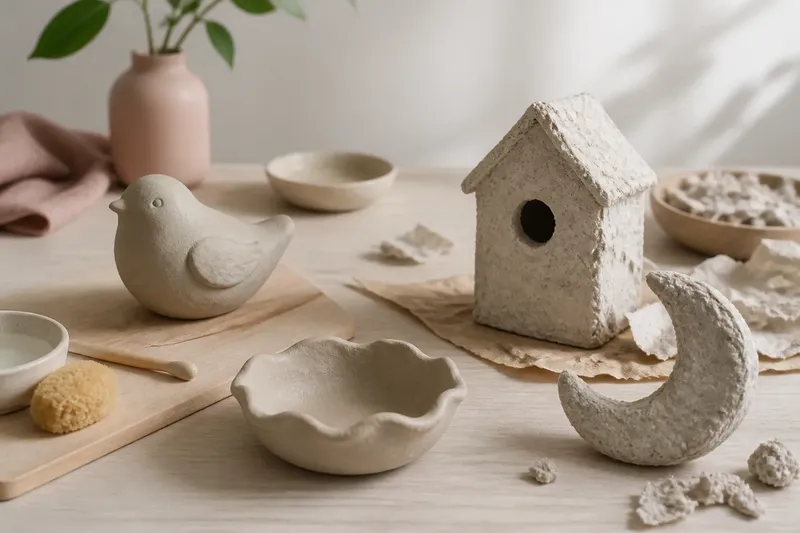
Should you choose air-dry clay or paper pulp for a small sculpture? Start with the shape you want to hold: clay suits a compact form with a firm, smooth surface, while paper pulp favors light, fibrous shapes that can look pressed, torn or softly irregular. Both are approachable materials, but they invite different kinds of touch.
If you are making a little animal, a rounded dish-shaped ornament or a simple figurine, the difference becomes practical quickly. Clay lets you press and refine a solid silhouette. Pulp lets you build a light shell or a lumpy, handmade texture. Neither material is the universal winner; the right choice depends on what you want your hands to do and what you want the finished object to feel like.
What Does Each Material Feel Like?
Air-dry clay usually arrives ready to shape. It feels dense and cool, and it holds pressure marks as you pinch, roll or smooth it. Depending on the product, it may be soft and pliable or firmer and more resistant. Small changes to the surface are easy to see, which makes clay useful when you want control over a nose, rim, ridge or rounded edge.
Paper pulp is made from softened paper fibers, sometimes mixed with a binder or other ingredients. Prepared pulp often feels damp, fluffy or pasty rather than clay-like. You can press it onto a form, pack it into a mold or build it up in layers. Its fibers remain part of the visual character, so a perfectly smooth finish may take more attention than it would with clay.
There is also a difference in how mistakes feel. A clay shape can often be pressed back into itself while it is still workable. Pulp can be lifted, rearranged or added to, though a wet patch may need time to settle before you can judge its profile. Think of clay as shaping a continuous lump and pulp as composing a surface from fibers.
Which Material Suits Your Shape?
Choose clay for forms that rely on crisp, compact contours. Pinched bowls, small heads, simple geometric objects and solid-looking fruit are natural candidates. You can make a rounded body and attach smaller pieces, then blend the joins with a damp tool or fingertip if the clay’s instructions allow. The material gives you an immediate sense of volume.
Choose pulp when a light, uneven or hollow-looking form is part of the idea. A bird with a broad, textured body, a craggy pebble-like object or a small mask with a rough surface can benefit from the fiber structure. Pulp can also suit objects built around a temporary support, such as a crumpled paper shape, though the support and drying method need to suit the pulp product.
Imagine you want to make a small mushroom ornament. If you want a smooth cap and a stout, rounded stem, clay gives you a direct route: form each piece, join them, and refine the contours. If you want a light cap with a mottled, bark-like surface, pulp pressed over a suitable support may fit better. In either version, the design itself points toward the material before you begin.
For thin projections, tiny handles or narrow legs, consider how the material behaves at its weakest point. A slender clay part may be fragile once dry, while a pulp part may need enough thickness or support to keep its outline. Make the design robust rather than expecting either material to behave like metal or fired ceramic.
How Do You Build and Join Forms?
Clay is usually shaped by pinching, rolling coils, pressing slabs or combining these approaches. Keep joins modest: score or roughen the contact areas if the product calls for it, add a little moisture as directed, and blend the seam without soaking the whole piece. Large changes in thickness can dry unevenly, so a compact form with fairly consistent walls is easier to manage.
Paper pulp is often pressed, layered or packed. You might form it around a mold, spread it over a temporary armature, or build up an irregular mass by adding small portions. Pressing helps fibers settle together, while thin, even applications can make the outline easier to control. If you want a hollow piece, the support must release or remain safely inside the finished form according to the material’s intended use.
Imagine a maker shaping a small crescent moon ornament. With clay, they could roll a coil, curve it, then flatten and smooth the face. With pulp, they could press a thin layer around a removable crescent-shaped support and add a second layer where more thickness is wanted. The expected visible difference is a firmer, more continuous clay surface versus a lighter form with a more fibrous texture.
For either material, keep a simple tool set nearby: a plastic modeling tool or blunt wooden stick, a small sponge, a bowl for water if appropriate, and a board or washable mat. A toothpick can mark details, but deep holes may weaken a small form. Use tools to clarify the shape, not to add surface marks everywhere by habit.
What Finish Can You Expect?
Clay tends to give a more unified surface. You can smooth it with a damp fingertip or sponge where the product permits, or leave tool marks visible for a handmade finish. Once dry, it may be painted, sealed or left plain depending on the intended use and the maker’s directions. A coating can change the look, so try it on a small hidden area or a spare piece first.
Pulp naturally shows fibers, soft edges and small variations in density. Those features can be attractive on their own. If you want a more even surface, add and smooth additional pulp where needed, then consider an appropriate primer or paint after it dries. Heavy coatings can obscure the texture that made pulp appealing, so decide whether you want to preserve or cover the fibers.
Neither material should be treated as waterproof merely because it is dry or painted. A decorative object can be kept away from standing water and damp locations unless the product’s labeling says it is suitable for them. For a serving object, toy or item that will be handled frequently, check the manufacturer’s intended-use information rather than assuming a craft finish makes it appropriate.
How Do Drying and Finishing Differ?
Both materials need time to dry, and thickness, room conditions and the product formula affect the process. Air-dry clay may shrink as moisture leaves, and a thick piece can take longer than its surface suggests. Paper pulp can also remain damp inside a dense area. Place the work on a suitable surface and allow it to dry as directed, turning or adjusting it only if the instructions recommend that approach.
Try to avoid rushing with strong heat. Sudden drying can contribute to cracks, warping or a surface that dries faster than the interior. If a form develops a small crack, the best repair depends on the product: some clays accept a little fresh material, while some pulp mixes can be patched with more pulp. Follow the maker’s guidance and let repairs dry fully.
After drying, clay often needs sanding only if you want to remove a rough edge or tool mark. Pulp may need more surface preparation if your goal is a painted, even finish. Use suitable ventilation and protective practices for sanding or applying coatings, and follow the product labels. For a casual first project, a naturally textured finish can spare you extra finishing work while keeping the material’s character.
Which Material Is Easier to Start With?
For a first small sculpture, choose the material whose working feel matches your patience. Clay is straightforward if you want to pick up a lump and immediately model a recognizable object. Pulp is appealing if you enjoy layering, pressing and responding to irregular texture. Prepared pulp can vary in consistency, so it helps to know whether it is meant to be molded, spread or applied over a support.
Workspace matters, too. Clay can leave damp residue and may need a protected board for drying. Pulp can be messier to portion and may require a mold or support, especially for hollow forms. Keep unused material covered as its instructions advise, and clean tools before residue hardens.
If you are uncertain, make two tiny samples rather than committing to a finished sculpture. Shape a simple ball or curved strip in each material, then compare the pressure marks, edges and surface after drying. This is a low-stakes way to discover whether you prefer smoothing a solid mass or building a fibrous skin.
What Should You Choose for Your Project?
Use the questions below to match the material to the result you have in mind:
- Do you want a smooth, compact silhouette? Start with air-dry clay and keep the form simple.
- Do you want a light, fibrous or irregular surface? Try paper pulp and let some texture remain visible.
- Will the design have delicate projections? Redesign them as thicker, supported shapes rather than relying on a fragile narrow piece.
- Do you want to build around a hollow space? Pulp may suit a shell-like construction; check that your support and pulp product are compatible.
- Do you want to refine small contours directly? Clay offers a more immediate way to pinch, smooth and adjust a continuous form.
- Do you want the material itself to show? Pulp’s fibers or clay’s pressure marks can become part of the finish instead of flaws to erase.
These choices are not rigid rules. You can also combine materials in a project if they are compatible and the finished object does not need to withstand conditions beyond their intended use. For a first piece, though, keeping to one main material makes it easier to understand why a surface behaves as it does.
Which Questions Help Decide?
Can you paint air-dry clay?
Many air-dry clay projects can be painted after they are fully dry, but the suitable paint and any sealant depend on the clay product and the object’s intended use. Follow the product directions, and remember that a painted surface is not automatically suitable for wet or food-contact use.
Can paper pulp be molded?
Some prepared pulp can be packed into molds, while other mixtures are better suited to layering over a support. Check the product’s instructions and use a mold that releases the material as intended.
Which material is lighter?
Paper pulp is often the more natural choice when you want a light form, especially if you build it as a shell rather than a solid mass. The actual weight depends on the materials, thickness and construction, so keep the shape and support in mind.
Can you mix air-dry clay and paper pulp?
You can explore a mixed-material piece, but the materials may dry, shrink or adhere differently. Use them together only when their product directions support that use, and keep the join simple for an early project.
Let the Surface Decide
When you compare air-dry clay or paper pulp, picture the finished object in your hand. Clay is a strong fit for a form that asks for direct modeling and a unified surface. Pulp makes sense when a light build and visible fibers are part of the appeal. Neither choice needs to be permanent; a small sample can tell you more about your own preferences than a long list of abstract pros and cons.
Before opening a packet, sketch the object’s outline and mark its thickest, thinnest and most textured areas. If the shape reads clearly as a compact solid, reach for clay. If it depends on a light shell or a rough, layered surface, try pulp. That small decision gives your hands a useful starting point—and leaves room for the material to surprise you.